
5 tips on Still Life lighting
Did you know that lighting is the most important element in still life photography ?
It is true. Lighting adds atmosphere, provides context, heightens interest and helps create dynamic shots, so if you want to learn how to light a still life scene, then you're well on your way to capturing great images.
In this article, I share my top five lighting tips for great still life photos; by the time you're done reading, you'll be ready to light your shots like a pro (and get great results every time!).
Let's get right into it.
1. Use directional lighting
The best still life photos tend to have a lot of texture and if you want to bring out the texture then edge light is the way to go. In other words, position the light source to the side so that one part of the still life scene is brightly lit while the other part has heavy shadows.
Note that directional lighting can be created using studio lights or natural window light. Personally, I prefer studio lighting, as it offers more control over the final result, but window lighting can still work (and many great still life photographers only use window light).
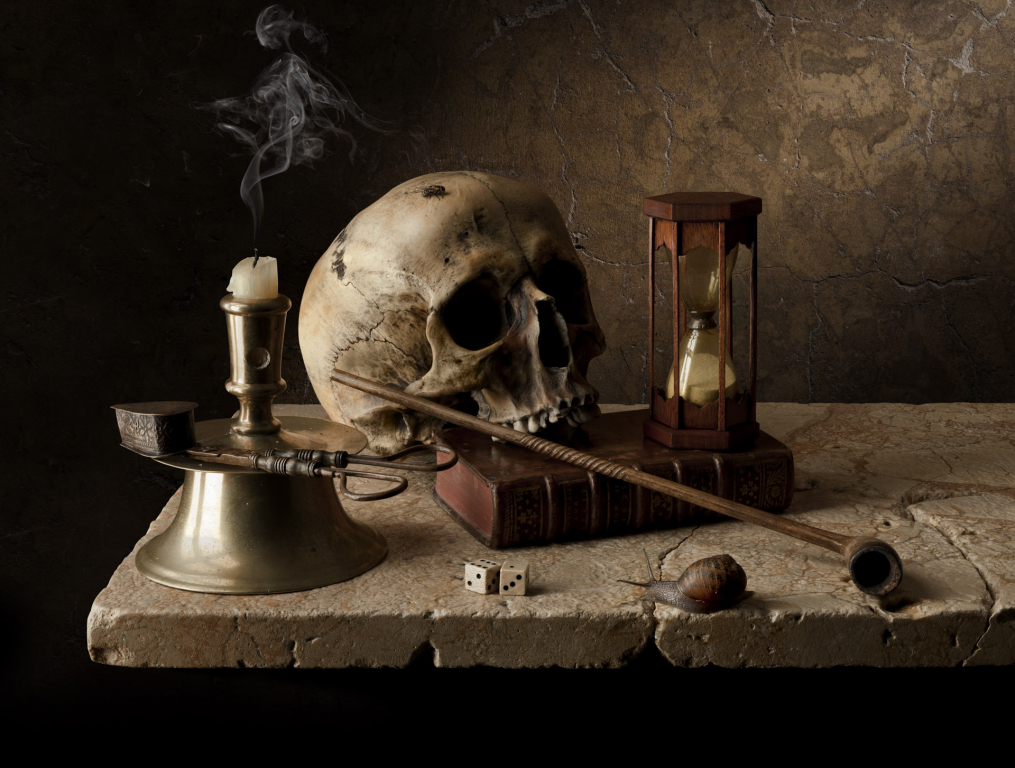
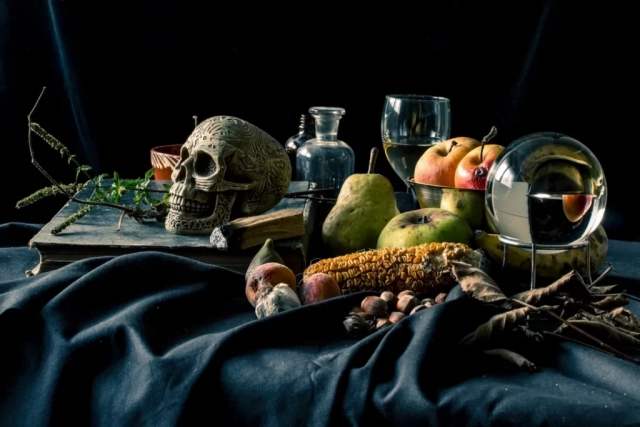
Now, sidelight encompasses a number of different lighting angles, so I encourage you to experiment until you get the images you seek. If you position your light source to hit the scene from a 90 degree angle—in other words, aim for true sidelight—the result will be dark, moody, and highly contrasted. (For reference, the image displayed above was taken with an illumination angle close to 90 degrees.)
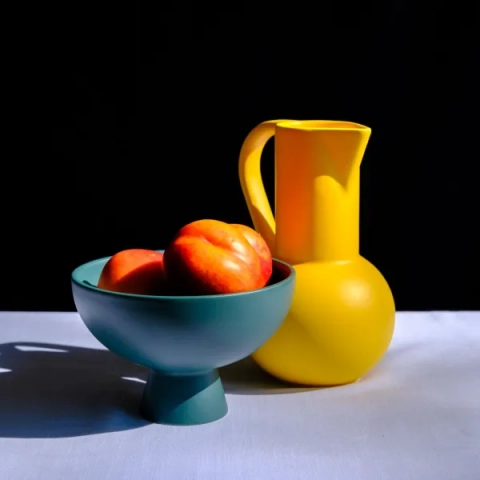
But if you position your lighting setup to hit the scene at 45 degrees, you'll get a combination of texture, three-dimensionality , and detail, more like this:

Neither option is better than the other; it all depends on your goals!
2. Make sure you use modifiers
Whether shooting in window or artificial light, panels are an absolute must.
The panels are placed between the light source and the subject and (generally) diffuse the light for a softer effect.
If you're using window light, simply take some white fabric, such as a bed sheet, and drape it over the entire window glass. (If you're shooting on an overcast day or the sun is shining at an oblique angle, you might not need a panel, but I'd still encourage you to have one on hand just in case.)
If you're using artificial light, there's a number of modifiers to choose from, including:
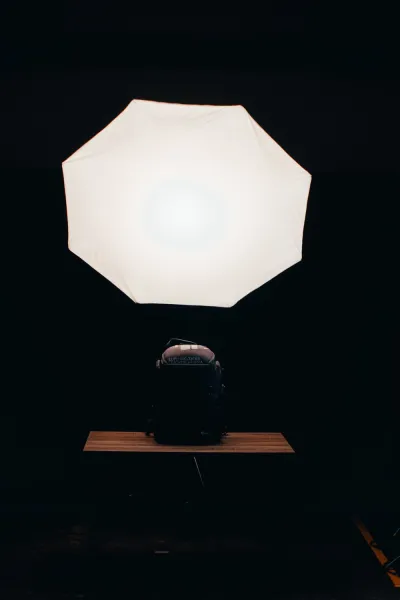
My recommendation? Start with a decent sized softbox. It will give you a good combination of diffusion and control, so it's easy for you to get the effects you want. Over time, you may grow your collection of modifiers and test out other options, but a single softbox can be tremendously versatile, and you can definitely use it to achieve pro-level results.
3. Don't be Afraid to Add a Reflector (or Second Light)
Every lighting setup in still life photography should start with a single light source. Position the first light, take a test shot and see what you think.
If you like the result, it's great and you can continue working on the scene from there.
However, if you feel that the dark side of the scene, i.e. the shadow part, is a little too dark, you might consider using a reflector or second light (also called a fill light ).
Reflective panels are much easier to handle (and cheaper too!), so they're a good place to start. Simply put a reflector in front of the main light source, on the other side of the scene. Take another test shot; if you want more details, bring the panel closer to your objects. And if you want less detail (i.e. more shadows), move the panel away from the objects. Is everything clear so far?
Note that reflective panels come in many different sizes and colors, so you should take the time to experiment with different options whenever possible. However, if you can't afford multiple reflectors (or prefer to keep your kit as simple and light as possible), I'd recommend getting a large white reflector, which will come in handy in a huge variety of situations.
You also have the option of using another light, i.e. a fill light, instead of a reflector. Fill lights offer more control, but are also more difficult to use. You'll need to fine-tune the brightness level until you get the desired result, which can involve a lot of adjustments and test shots.
And whatever you do: make sure the power of the fill light is lower than the power of the main light source . You don't want to cast shadows on the other side of the scene!
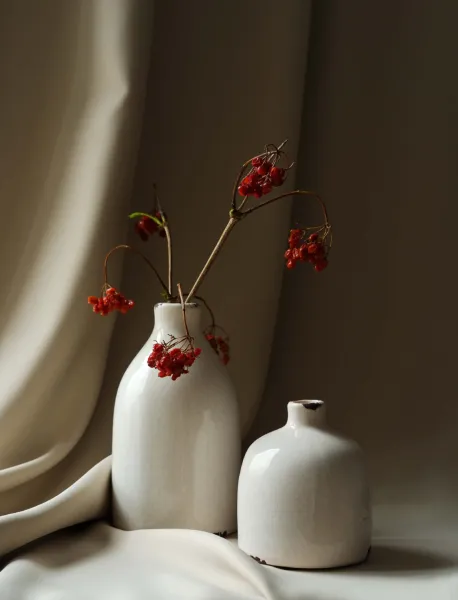
4. Pay attention to the background
The best still life photos feature a background that complements the main subject. This could be:
- A solid white wall
- A textured wall
- A single color curtain

Whatever background you choose, make sure it adds to the scene and doesn't distract.
Including a distracting background is one of the easiest ways to ruin a still life shot!
You should also pay close attention to how light and background interact. If you're using a fabric backdrop, watch out for ripples; these will become especially noticeable if you're working in heavy sidelight.
It may help to take a test shot or two before you start. If you find the background looks a bit too bright, consider moving the still life scene and light a few feet forward and/or moving the light more to the side. On the other hand, if the background is uncomfortably dark, do the opposite: move the setting towards the background and/or shift the light so that it hits the background more directly.

5. Look at your camera angles
My last tip for still life lighting is simple:
Make sure you choose the right camera angles to get the desired effect.
It might not seem like it, but your camera position can drastically change the lighting scenario. For example, if you position the camera directly in front of the scene but then turn on the light to the side, the final image will have strong side light. However, if you move the camera so that it is facing the light source you will end up with backlighting whereas if you move the camera so that it is next to the light source you will end up with direct front light instead.
Experiment a lot, and over time, you'll get a feel for the effects of different lights and camera angles. I'd also encourage you to try new angles in hopes of getting creative compositions; In my experience, the coolest photos give a unique perspective to an ordinary scene!
Still life lighting tips: last words
Now that you've finished this article, you know all about lighting your still life scenes and are ready to capture stunning images.
Then experiment with different lighting angles. Try different wallpapers. Practice with a reflector and soon you will be an absolute master of still life!
When you subscribe to the blog, we will send you an e-mail when there are new updates on the site so you wouldn't miss them.
About the author
By accepting you will be accessing a service provided by a third-party external to https://www.insightadv.it/


Comments