
How to use Fill Flash effectively in some situations
Many photographers experience anxiety when they think about using flash. It is a large unknown, difficult to control and it is very difficult to predict what the results might be like. Actually knowing when to use flash to enhance a photograph is just another choice to make. A bit like deciding which lens to use to take a particular photo. Getting the right amount of light from your flash to complement your photo is key to effective fill flash photography. In this article, we'll look at some tips on when and why you might choose to use fill flash effectively. In any case, we had already talked about it here , or at least with regard to flash in general.
Using Fill Flash effectively – what, when and why
Fill flash (or fill-in flash or fill flash) is typically used to balance ambient light to give the main subject a more pleasing exposure. So it's filling in with additional light to get a better or more interesting exposure. Balance is the key. When the light from a flash overpowers the ambient light, it's no longer fill flash.
You can make use of fill flash not only at night or in dark places, but also when there is a lot of light. Fill flash can be used to effectively diminish or eliminate unwanted shadows when the ambient light is very bright.
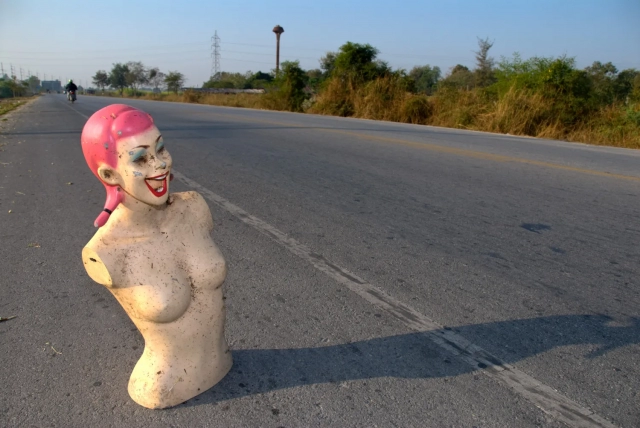
Fill flash and bright sun
The bright sun casts a hard, dark shadow. When there is no other light source or reflected light, contrast can cause problems.
When photographing people in bright sunlight, they will often have dark shadows under their eyes, nose and chin. Adding some fill light can help fill in these shadows. Adding the right amount of light from your flash is important so that it is balanced with the sunlight. In this photo taken by Kevin Landwer-Johan of a mannequin by the side of the road, fill flash has been added. Kevin directed the flash at the smiling figure. He set the output to be well lit, but his shadow, cast by sunlight, is still light.
 ©Kevin Landwer-Johan
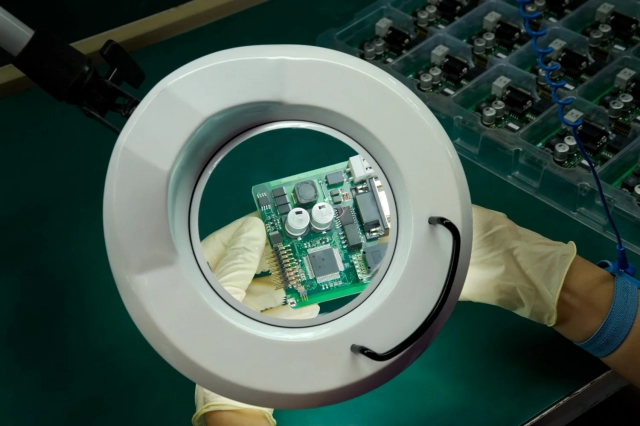
Electric light source and fill flash
When you have any light source causing your main subject to be dimly lit, adding fill flash can help. The large magnifying glass in this photo has a light behind it to illuminate the electronic board. If no fill flash had been added, the electronic board would have been well exposed, but the white border of the magnifying glass would have been underexposed. Fill flash can even out the light when it's important that everything in the photo is well exposed.
 ©Kevin Landwer-Johan
Using ambient light as a backlight
Photographing your subject with the main light source behind them is known as backlighting. This situation can also create problems when you want evenly exposed photos.
By adding fill flash to a subject that is backlit, you can bring a balance of light and achieve an even exposure.
By controlling the flash output to emit slightly less light than the ambient light, you can leave a soft shadow on your subject's face: if you don't use the flash, the shadow would be much harder and darker, creating an completely different.
 ©Kevin Landwer-Johan
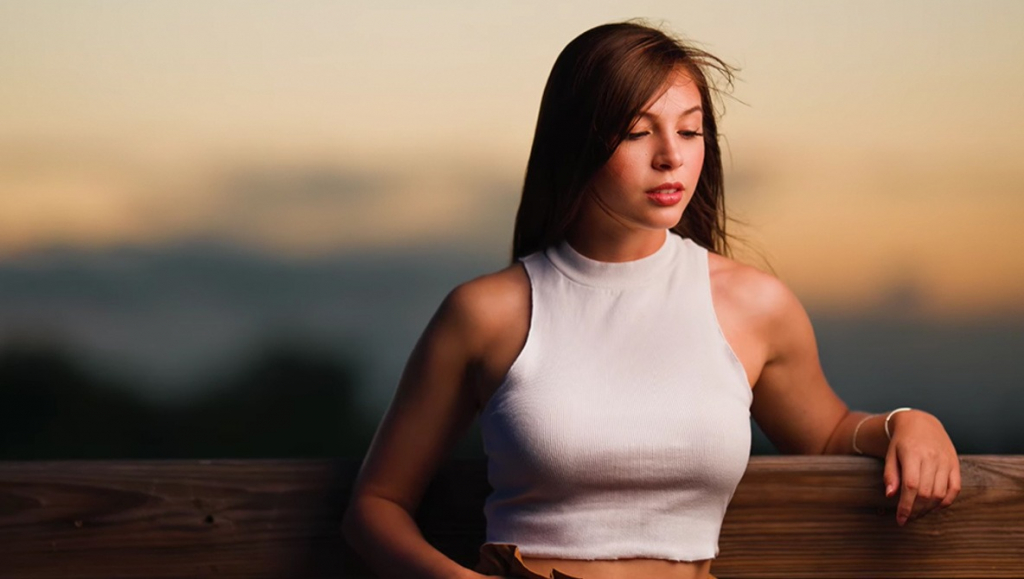
Use Fill Flash effectively with a bright background
Bright backgrounds, even on overcast days, can sometimes cause your subject to be underexposed if you're not careful: adding a little flash helps.
The bright background behind the model in this photo wasn't super bright, as it was an overcast day. To be able to make it a little brighter than the background, just position the flash to the left. Perhaps with the addition of a small softbox for the flash so that it is diffused thus giving the sensation of ambient light.
 ©Kevin Landwer-Johan
Illuminate your subject at dusk or dawn
At the end or beginning of the day, when the sun is low in the sky or just below the horizon, fill flash can be useful. Sunrise and sunset can produce beautifully colored skies, but they will often be brighter than your subject. If you set exposure for the sky, your subject will be underexposed. If you set the exposure for the subject, the sky will be overexposed and the color effect in the photo will be lost.
By adding a little flash to your subject, so that it is balanced with the light from the sky, your subject will be brighter without losing the brightness and color of the sky.

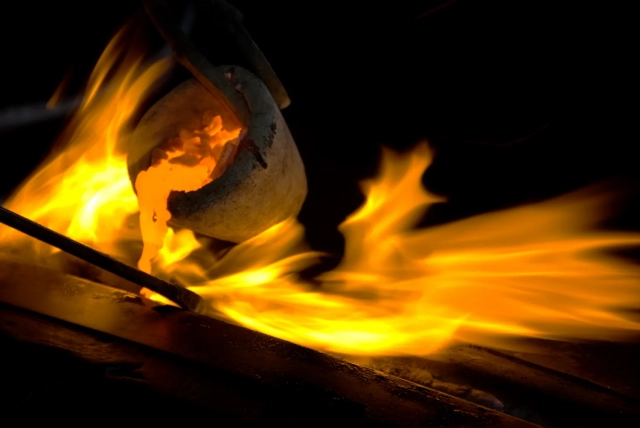
Fill flash and fire
This example is slightly different but has the same principle. In this case, part of the main subject is the light source.
In this photograph we are in a closed environment. The workshop is quite dark, so the flames cast shadows on the dark metal. Without using fill flash in this scene, the crucible, tongs and edges would have been too dark. Using a fill flash makes more detail visible in these areas.
 ©Kevin Landwer-Johan
Slow shutter and fill flash
Whenever there is motion in a scene you can use a slow shutter speed to create a blur in your photos. Using a fill flash can add a whole other dynamic, particularly if you set up your camera and flash to sync well.
Many cameras allow you to set the sync to fire the flash just before one second or before the rear shutter curtain closes. This causes a partial 'freezing' of the movement in a more attractive way.
 ©Kevin Landwer-Johan
Again, balancing flash power is important to get the best effect. For this technique, I generally set my flash power to be slightly brighter than the ambient light. If the output is equal or less, you won't see the effect much or at all.
How to use flash well
Flash need not be mounted on camera hot shoe pointed directly at subject.
Diffusing the flash, or bouncing it off a reflector or other surface, will soften the light. Placing the flash on its side, above, or below will often produce more interesting and pleasing results.
Controlling the power of the flash is always essential. Too much or too little flash light causes an imbalance. You need to decide how much light your photo requires and make the correct adjustments to your flash.
Metering through the lens (TTL) is often the simplest setting. You can also use the automatic mode. Sometimes, with one of these settings, you may need to adjust the compensation so that the light is a little brighter or dimmer.
Using the Manual setting on the flash requires a little more thought and experimentation. It can often produce more reliable output from the flash when taking a series of photos. This is especially useful when there are variables in light or camera/subject/background distances.
Conclusion: Use Fill Flash effectively
Adding fill flash can make a positive difference to your photos in many situations. When you're not satisfied with ambient light alone, consider adding some light from your flash. Even if the only flash you have is the pop up flash from your camera.
You may not get the result right the first few times you try this method. Experiment. Study your results. Compare photos where you didn't use flash with those where you did. Over time, you will develop a sense for when adding fill flash will enhance your photographs.
When you subscribe to the blog, we will send you an e-mail when there are new updates on the site so you wouldn't miss them.
About the author
By accepting you will be accessing a service provided by a third-party external to https://www.insightadv.it/


Comments