
How to take wonderful portraits at night
Nighttime portraits offer a mystical blend of shadows and artificial light that, when executed skillfully, can be enchanting and even breathtaking.
However, nighttime portrait photography presents its unique challenges. Focusing in the dark can be a daunting task, and achieving sharp, well-exposed images can seem like a real feat. Consequently, many aspiring portrait photographers often get discouraged before even starting.
Fortunately, capturing stunning night portraits can be surprisingly accessible with the right techniques. I myself love taking nighttime portraits, and in this article, I'll share my best tips, including:
- Optimal settings for outstanding results
- How to leverage both artificial and natural light for exceptional effects
- A simple method to capture stunning nighttime backgrounds
- Many other tips!
If you're ready to become a master of nighttime portrait photography, then let's dive right in!
Settings for Nighttime Portrait Photography
When venturing into nighttime portrait photography, it's essential to adjust your camera settings to balance limited light with the need for superb image quality. Here's the approach I recommend:
The ideal camera mode for nighttime portraits
Automatic mode might seem like the easiest choice, but it's not advisable for nighttime portrait photography. Often, in automatic mode, you risk getting one of two results:
1. A blurry and unusable image.
2. A subject overexposed by a too powerful flash with a black background.
 This is the type of result you'll get if you combine automatic mode with your camera's flash. The subject is well-illuminated, but the background is unpleasantly dark.
These results are usually less than optimal, so it's essential to abandon automatic mode as soon as possible. Instead, you should consider manual modes like Manual or Aperture Priority. These modes allow you to adjust settings to your liking. Aperture Priority mode lets you select the aperture and ISO, while the camera automatically adjusts the shutter speed to achieve a balanced exposure. Manual mode offers you complete control over aperture, ISO, and shutter speed.
If you're new to these settings, start with Aperture Priority mode to become familiar with various exposure settings. Once you gain confidence, you can switch to Manual mode for full control.
The best aperture, shutter speed, and ISO for nighttime portraits
It's essential to carefully choose each of these settings because aperture, shutter speed, and ISO not only influence exposure but also other aspects of the image. Aperture controls depth of field, shutter speed affects sharpness, and ISO impacts overall image quality.
Therefore, it's crucial to select these settings carefully. Here are some tips:
- Start by choosing the aperture based on the desired depth of field. For an artistic effect with shallow depth of field, opt for a wide aperture like f/2.8. If you want a sharper background, choose a narrower aperture, such as f/8.
- Next, select the slowest shutter speed that will allow you to capture sharp shots. For stationary subjects, you might choose 1/160s. If the subject is in motion, you may opt for 1/500 or higher.
- Finally, set the ISO to your camera's native setting (typically ISO 100) to achieve the highest image quality.
Once you've selected these ideal settings, frame your subject and check the exposure meter. If the image is underexposed, you'll need to increase the ISO or open the aperture further. Personally, I prefer wide apertures for nighttime portraits, but if you're aiming for a sharp background, you can increase the ISO until you achieve the desired exposure. If the image is overexposed, increase the shutter speed until the exposure meter is balanced.
Lighting for Nighttime Portraits
Without some form of artificial lighting, capturing detailed images of subjects in nighttime portraits is challenging. Your photos may appear significantly underexposed or extremely blurry, both of which are less than ideal results.
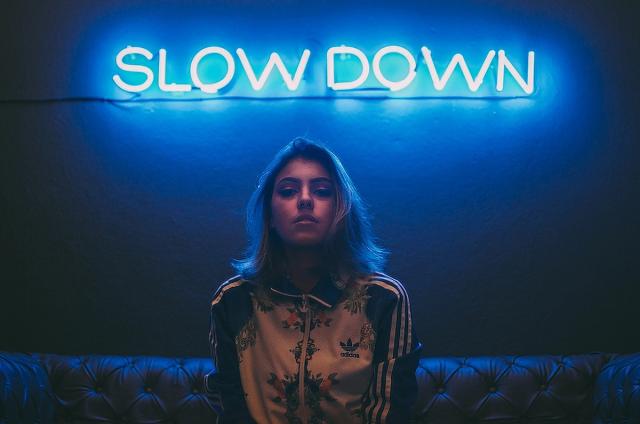
Keep in mind that artificial lighting doesn't necessarily have to be a flash. It could be light from a lamppost, a neon sign, or even a cell phone flashlight. The important thing is that the light is available and usable with your camera. Therefore, before scheduling a photo shoot, make sure there are accessible light sources, and if you're relying on streetlights or other public sources, ensure they are sufficiently bright.
However, I recommend bringing an external camera flash for nighttime portraits. This provides you with flexibility and control over brightness and light direction. Additionally, you can use it to create artistic effects by illuminating only a part of the subject or creating interesting shadows.
When using an external flash, avoid direct flash on the subject's face, as this can create harsh shadows and red-eye. Instead, point it towards the ceiling or use diffusers to soften the light. Alternatively, you can also employ the fill light technique using a flash or a reflective panel to gently illuminate shadowed areas of the subject without overexposing the face.
Tips for Stunning Nighttime Portraits
If you're aiming to achieve professional-level nighttime portraits that capture the essence of the night powerfully and fascinatingly, then I recommend using some practical tricks of the trade. In this section, I offer many techniques to get started.
1. Use a Camera or Lens with Image Stabilization
Photographing in low-light conditions often requires the use of slower shutter speeds, and when your shutter is open longer, even the slightest hand movement can result in a blurry shot. This is where image stabilization technology comes into play. This feature is designed to compensate for small camera shake and vibrations caused by pressing the shutter button.
The importance of image stabilization in nighttime photography cannot be underestimated. It can genuinely make the difference between a sharp and a blurry image, especially when the subject is stationary. Many lenses are equipped with this technology, and manufacturers label it with various names. When selecting a lens, look for terms like "VR" (Vibration Reduction), "IS" (Image Stabilization), "OIS" (Optical Image Stabilization), or "OS" (Optical Stabilization).
Furthermore, if you're considering purchasing a new camera, some mirrorless models offer built-in image stabilization. However, it's important to note that not all cameras have this feature. So, if image stabilization is crucial to you, make sure to check for it in the camera's specifications.
2. Don't be afraid to use a tripod and flash
When you take portraits using flash, the subject will be well lit, but the background will remain in shadow. In this situation, you have three options available:
- You can embrace the effect of a black background, creating a striking contrast between the subject and the background.
- You can increase the camera's ISO until the background appears bright enough, although this may result in a reduction in image quality.
- You can mount the camera on a tripod and capture a long exposure with the help of a flash in multi-shot (flash burst) mode.
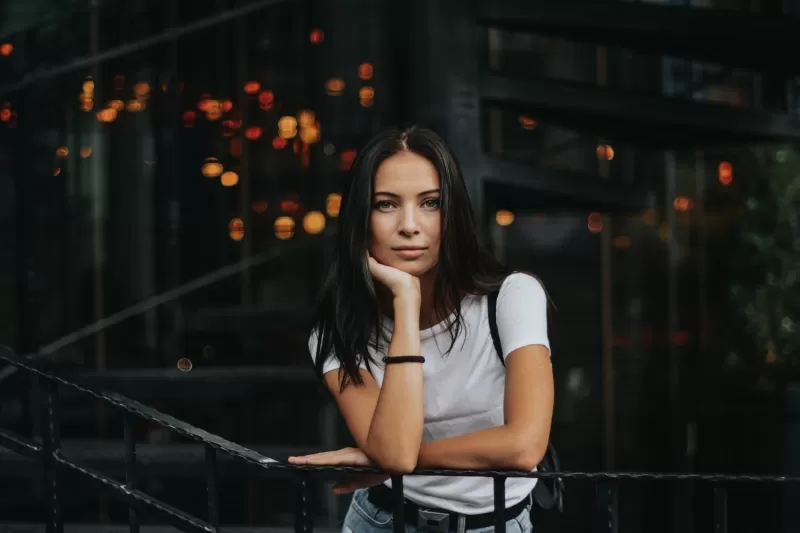
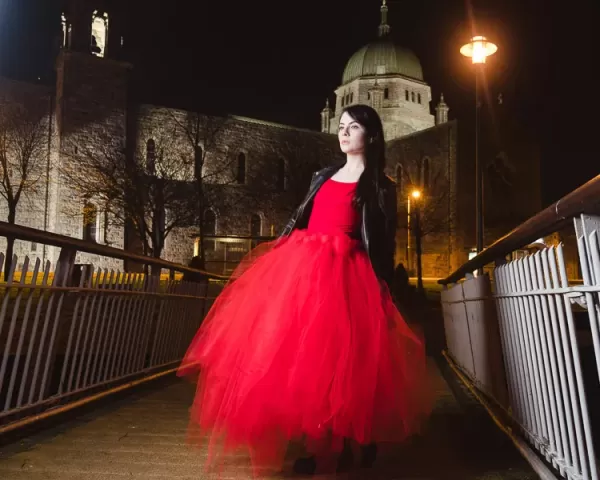
A black background can bring a glamorous look to your images, especially if you're looking for a deeper, more dramatic aesthetic, as shown in the example below. Conversely, using a higher ISO can give you better exposure of the background, albeit at the expense of image quality.
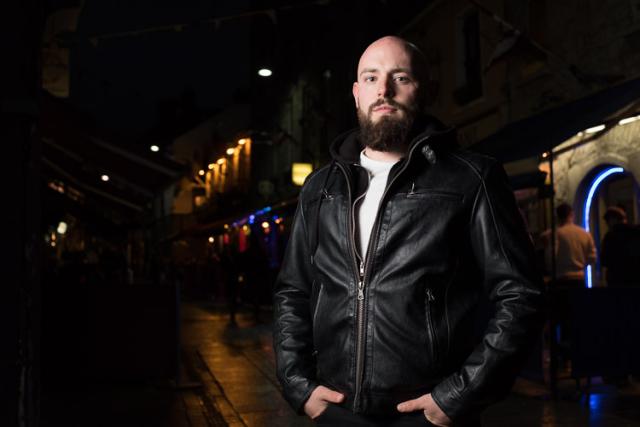 Using flash and a fast shutter speed will keep your subject well exposed but darken the background.
However, the long exposure flash technique can also produce amazing results, so I recommend you learn it. Here's how you can do it:
- First, make sure you use a stable tripod to avoid blur during long exposures. Furthermore, consider using a remote control to take the photo without touching the camera.
- Compose the scene and adjust exposure settings taking into account the background, not just the subject. To prevent your subject from being overexposed, set a shutter speed that slightly underexposes the background.
Remember that your shutter speed should be relatively slow (generally 1/30 or slower) to capture details in the background. - Finally, take the photo using flash. The basic idea is that the flash will freeze the subject, while the long exposure will allow the camera to record the light coming from the background.
The result will be a well-lit portrait with a detailed, albeit slightly underexposed, background.
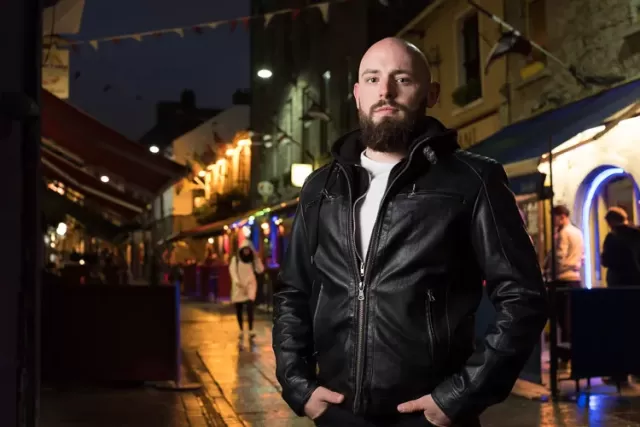 This image is identical to the one shown above, except I used a longer exposure (1/30 second) to bring out the details against the background.
If your first attempts aren't perfect, don't worry! To get the brightness you want with the flash, you may need to make some adjustments. If your subject is too bright but you want to maintain the background exposure, you can try reducing the flash intensity or moving slightly further back from the subject. Alternatively, if the subject is too dark, increase the flash output or move closer to the subject.
3. Pay attention to the background
When you engage in night portrait photography, it's easy to overlook the importance of the background. After all, often in low light, the context can seem insignificant compared to the subject, right? But in reality, the background is a crucial element to consider.
Even when you opt for a black background, the final image will often include background elements, such as car lights, street lamps or illuminated signs, which will help define the setting.
If you then follow the technique I shared in the previous tip, your background will be clearly visible in the final photo, even though it may be barely visible through the camera's viewfinder.
In truth, the background is always an essential element in any portrait, whether you shoot at night or during the day. A good background can emphasize and complement the main subject, while a sloppy or chaotic background can distract the viewer's attention and hinder understanding of the subject.
Therefore, to get great shots, it is essential to choose your background carefully. Here are some practical tips:
- Before the photo shoot, explore the area for possible interesting backgrounds. Look for places with street lamps or other light sources that can create a charming atmosphere when combined with a large opening, as I will explain later. Also, don't underestimate the effectiveness of simple walls or walls that can make your subject stand out.
- When you start shooting, always take the time to examine the area behind your subject through the viewfinder. Make sure the context doesn't distract the viewer from the main image.
- Don't hesitate to experiment with different backgrounds by changing the camera angle. Sometimes, a small variation in framing can make the difference between a background that works and one that doesn't. Be creative and play with perspectives to get amazing results.
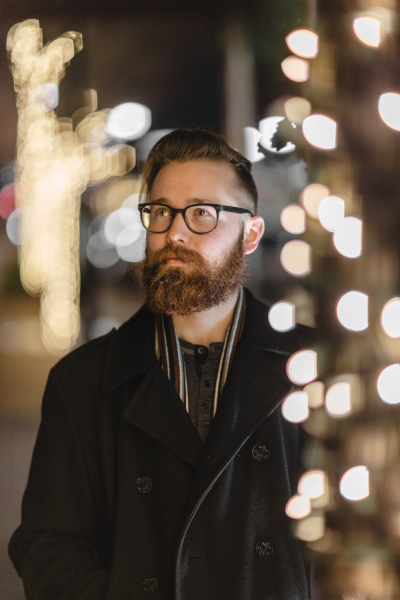
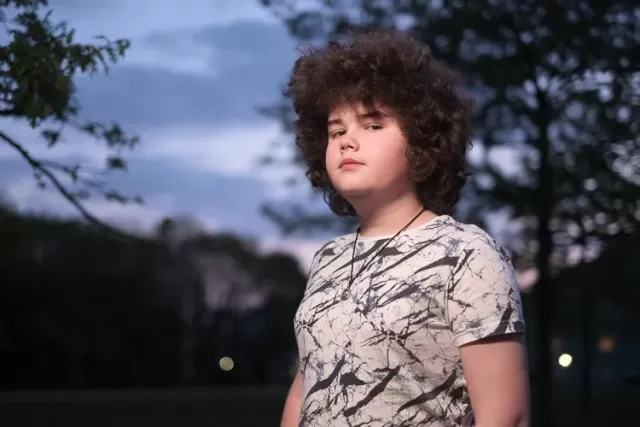
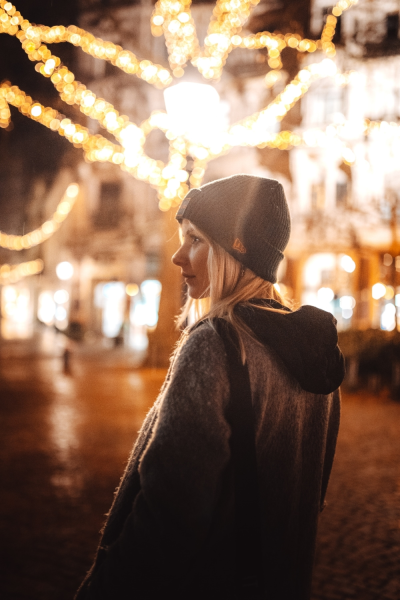
4. Look for points of light for great backgrounds
My previous tip for night portraits was about the importance of taking care of the context and background. This tip continues along these lines, but focuses on one of the most effective ways to create striking backgrounds that enhance the foreground subject.
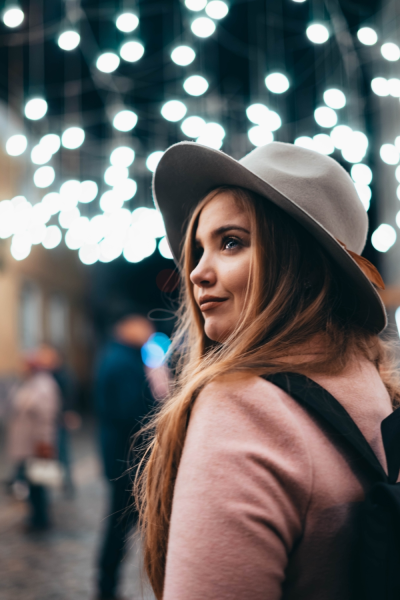
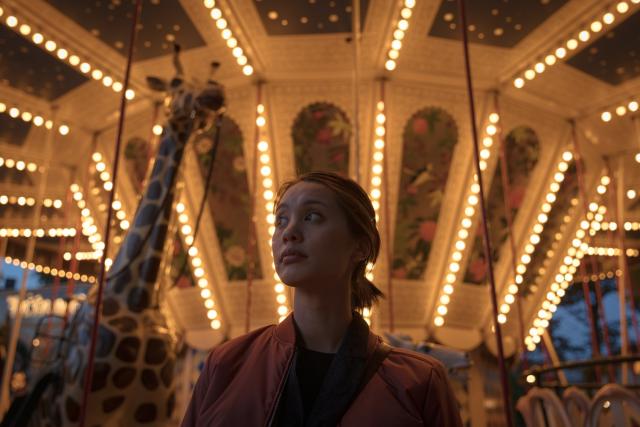
The night offers a variety of twinkling lights that can bring a unique magic to your portraits. Neon signs illuminating a remote alley, street lamps casting a warm glow on a rain-soaked sidewalk, or festive decorations glowing in a park – all of these artificial light sources can transform your portrait backdrop into something extraordinary, especially when used to create a beautiful blur effect, known as 'bokeh'.
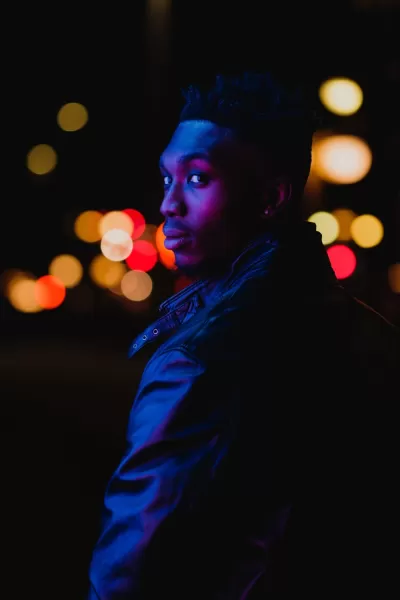
Here's how you can do it: position your subject so that small light sources are visible in the background, and use a wide lens aperture to achieve a shallow depth of field. Focus on your main subject and watch distant lights transform into beautiful blurry orbs.
Pro Tip: Focusing can be more challenging at night, so don't hesitate to use manual focus or single-point focus mode to get the shot you want.
Experiment with angles and distances to find the perfect composition. Moving closer to the subject tends to accentuate the bokeh effect, while moving away from the subject attenuates it. Don't be afraid to explore different options; sometimes, the least obvious shot can turn out to be the best!
5. Start with continuous lighting
While I've discussed using flash extensively to capture stunning night photos, it's important to recognize that while flash is versatile, portable, and powerful, it can be a complex light source to manage, especially for beginners. You can't judge the effect of the flash until you've captured an image, which means you'll have to spend time guessing, adjusting, and checking the lights. Additionally, getting the right exposure with flash can be a challenge; it is often necessary to spend a lot of time adjusting the brightness of the flash to obtain the desired result.
Fortunately, there is an alternative: continuous lights. These constantly illuminate the subject, allowing you to observe the effects in real time.
You can get portable continuous lights for a reasonable price, and while they aren't quite as powerful as flash, they are excellent for night portraits. Additionally, many continuous lights offer color temperature adjustments, which allow you to match the hue of the light to surrounding light sources, resulting in a more natural effect.
To get the best results with continuous lighting, you will probably need to increase the ISO sensitivity and/or open the lens aperture. My recommendation is to set the exposure based on the background, then bring the subject into the frame and make any necessary adjustments.
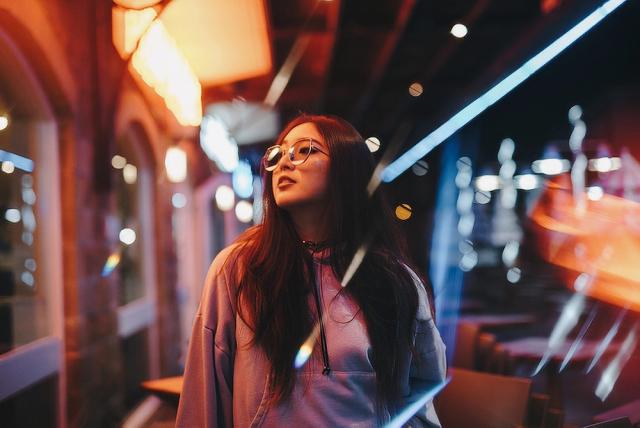
In the image below, an LED panel was used, which produced a warm and soft light, giving stunning results.
Pro Tip: If your continuous lights don't have a brightness control, you can simply move them closer or further away from your subject to adjust their intensity!
6. Try shooting in black and white
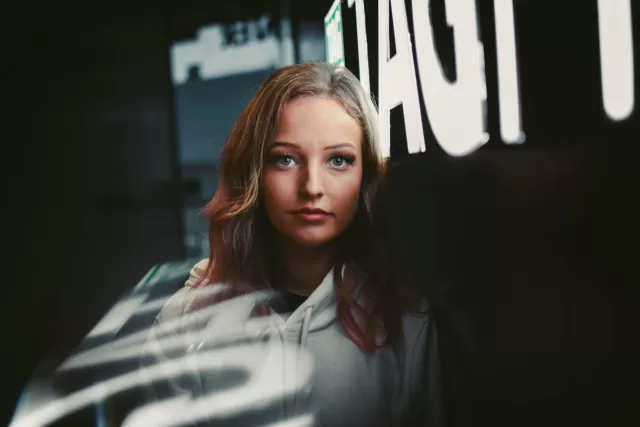
The colors of the night can certainly appear evocative, but have you ever explored the emotion evoked by black and white? The absence of color highlights textures, contrasts, and shadows in a way that can add a more glamorous, bold feel.
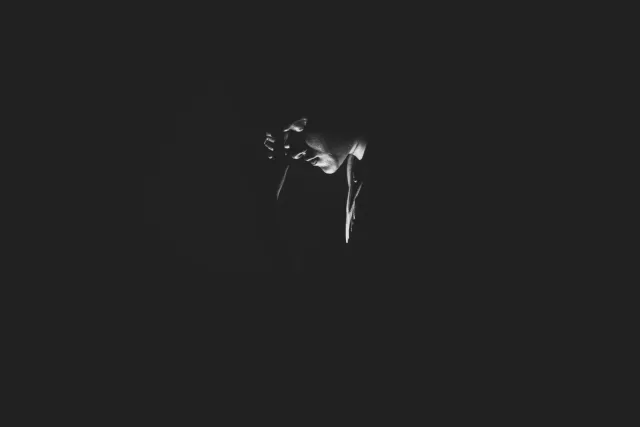
High ISO settings, sometimes necessary for night portrait photography, can often lead to noisy images. While this can be a drawback in color photography, noise tends to add striking character and texture to black and white images, reminiscent of the aesthetic of traditional film photography.
In conclusion, exploring contrasts and shadows through the black and white palette can produce dramatic and visually engaging results. Also, I highly recommend working in RAW format. This will give you the flexibility to convert your images to black and white during post-production, giving you a wide range of options to experiment with various monochrome effects and find the look that best suits your creative vision.
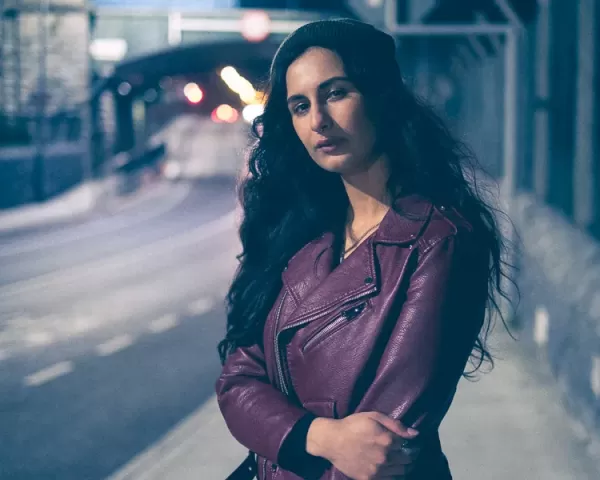
7. Consider styling your subject
When you're a novice photographer specializing in night portraits, chances are you simply focus on photographing your subjects as they present themselves.
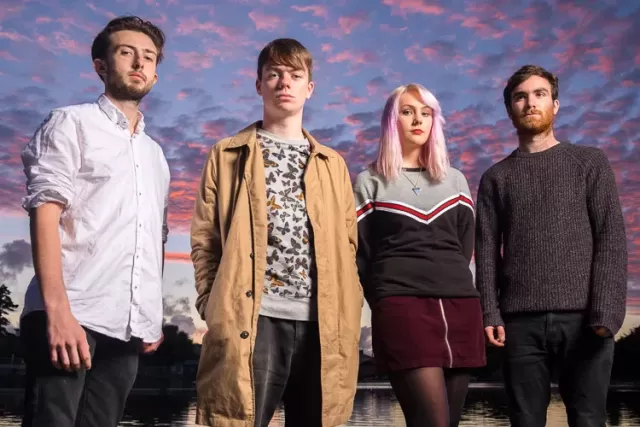
As you gain more experience, you might consider requiring your subject to do their own makeup and hair, or even wear elegant clothing to create even more stunning shots. Even if you're using friends as models, it's good practice to make sure they look professional, so you may want to offer some guidelines on choosing clothing from their wardrobe.
Of course, it will all depend on what you want to achieve with your night portraits. If your intent is to create works of art, then you are free to explore the more dramatic side and embrace unconventional clothing choices. However, if you aim to capture high-quality portraits intended to hang on your subject's walls, you may want to opt for a more classic and elegant style. Understanding the context and purpose of your photographs is essential to making informed decisions about clothing and style.

8. Add color grading to your images
Color correction is an artistic technique that can really enhance your night portraits. This technique involves making targeted changes to the tones and hues of an image during the post-production phase in order to create a specific atmosphere or style. Nighttime images, in particular, benefit from color correction.
I recommend taking the time to experiment with different color gradations in your favorite post-production software. Most editing software offers tools like color wheels, which allow you to select specific hues with great precision.
A classic combination that often produces great results is to add blue tones to the shadows and orange tones to the highlights. This combination creates a warm and cool contrast that can have a striking visual impact. Don't hesitate to explore different color combinations; experimentation can lead to extraordinary and surprising results.
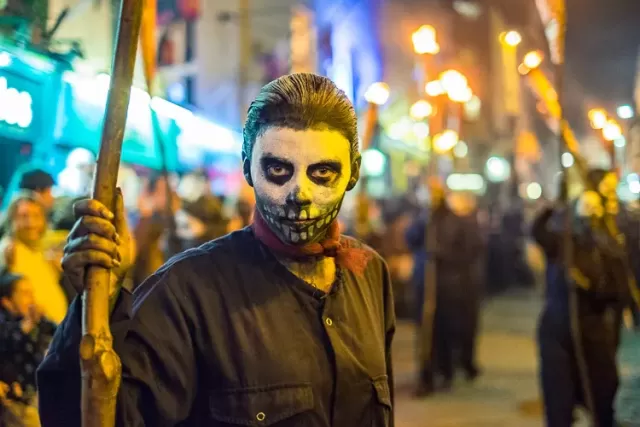
9. Try adding props
Props can add depth, context, and a spark of creativity to your nighttime portraits. However, it is crucial to make the right choice, especially when photographing in low light and trying to capture the atmosphere of the night.
Select props that complement the nighttime atmosphere and can take advantage of ambient light or reflect it in a charming way. Reflective or light-emitting objects can create intriguing effects. For example, large glasses are very popular in night portraits and can capture ambient light in unique ways.
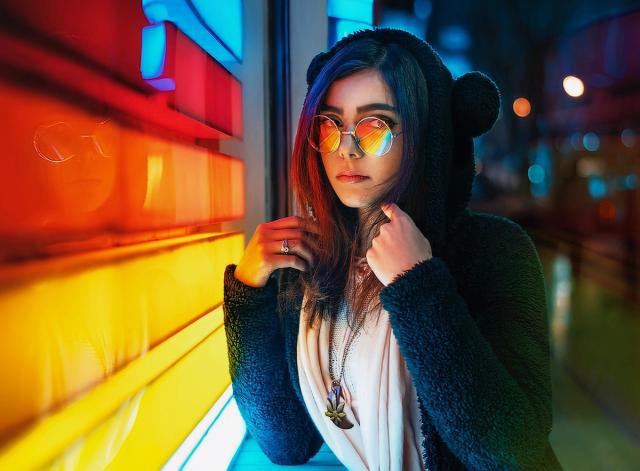
Decorative lights are a fantastic option; you can ask your subject to hold them or place them strategically to add a soft glow to the image.
However, it is essential to ensure that the props are in keeping with the overall theme and atmosphere of the photography. Avoid props that seem out of place or discordant with the nighttime setting, instead focusing on those that enhance the atmosphere. With a thoughtful choice of props and a touch of creativity, you can transform an ordinary night portrait into something truly memorable.
10. Use reflective surfaces
Le superfici riflettenti hanno un potere unico nell'arricchire i ritratti notturni, aggiungendo un tocco di fascino e creatività in più alle tue fotografie. L'arte di utilizzare elementi riflettenti può facilmente trasformare una buona immagine in una straordinaria.
Nelle aree urbane, è probabile che tu incontri numerose superfici riflettenti che si prestano bene alla fotografia notturna. Queste includono i finestrini delle auto, le ringhiere metalliche lucide e persino le pozzanghere d'acqua sulle strade. Questi riflessi possono catturare insegne al neon o altre luci colorate, creando effetti affascinanti nei tuoi ritratti notturni.
Posizionare il soggetto e la fotocamera in modo da sfruttare al massimo questi riflessi è cruciale. Sperimenta vari angoli e superfici per trovare l'aspetto che meglio si integra con il soggetto. A volte, un riflesso sottile può aggiungere un tocco di raffinatezza, mentre in altre occasioni, un riflesso audace e ben definito può creare un'immagine potente.
Inoltre, più riesci a essere creativo con i riflessi, meglio è. Rimanendo aperto alle opportunità, potresti scoprire riflessi inaspettati che mettono in risalto il bagliore di un lampione o il luccichio dei semafori. Non esitare a sperimentare anche con idee che potrebbero sembrare insolite; a volte, le soluzioni meno convenzionali possono portare a risultati sorprendenti!
11. Capture beautiful environmental portraits
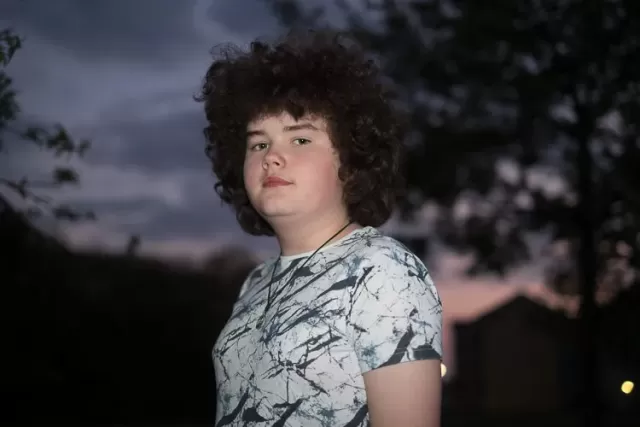
Close-up portraits are certainly fascinating, but have you ever thought about the enchantment of environmental portraits? Immortalizing a single subject surrounded by darkness, kissed by a soft light, has the power to leave you speechless. In these cases, the extra space around your subject offers context, tells a story, and adds another layer of meaning to your image.
A wide-angle lens or even simply moving away slightly may be all you need to capture a wider perspective. Finding a location free of background distractions is key. Look for spaces that allow your subject to emerge with minimal clutter of unwanted elements.
Pro tip: Incorporating negative space into your composition can create a minimalist yet powerful image. Experiment with your surroundings and don't hesitate to include background elements that enhance the subject or enrich the narrative. The night offers a dramatic and mysterious scenario; it's up to you to make the most of it in your photography.
Conclusions
Photographing night portraits may seem like a challenge, but with practice and following these tips, you can achieve incredible results. Experiment, discover new ways to use the night light and challenge yourself. Over time, you will develop your own techniques and distinctive style in night portrait photography.
Happy nightlight hunting and creating stunning portraits!
When you subscribe to the blog, we will send you an e-mail when there are new updates on the site so you wouldn't miss them.
About the author
By accepting you will be accessing a service provided by a third-party external to https://www.insightadv.it/


Comments