
How to take wonderful pictures in winter
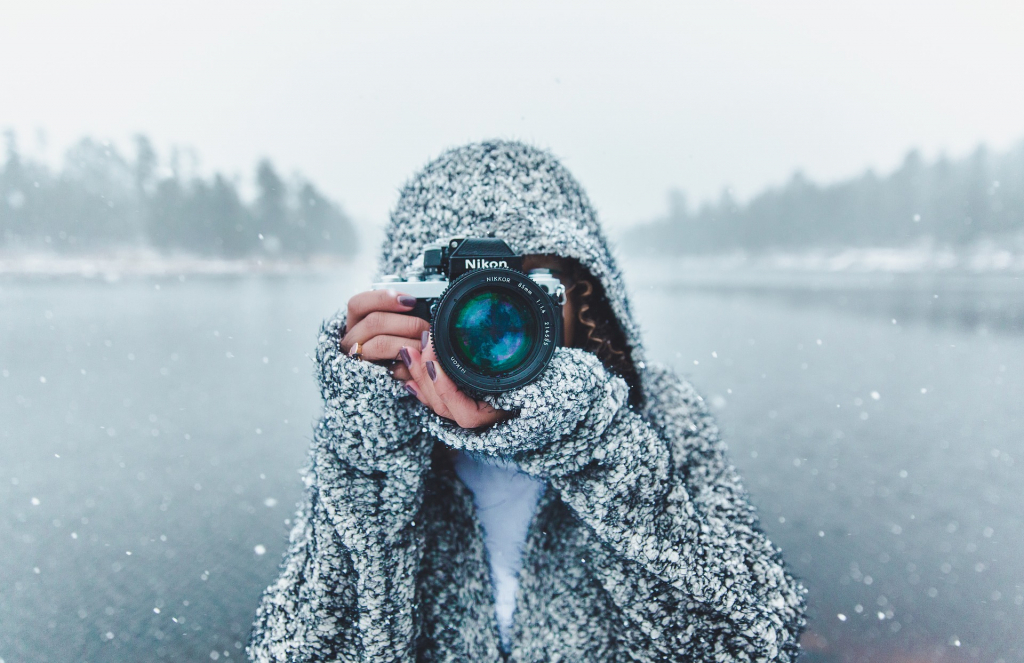
Winter is an amazing season for photography, especially nature photography. Conditions can be harsh, but your photos will reflect that – they will stand out and convey different emotions than normal. Of course, winter photography also brings its own set of challenges. This article offers a series of tips gleaned from what I've learned over the years both through personal experience and through the recommendations of a few photographer friends, and can be helpful in making your winter photography endeavors more productive and enjoyable.
For starters, I hope it goes without saying, but there are some winter safety challenges that matter more than normal. The icy roads are dangerously slippery, and “moderate” hikes can turn into grueling slog before you know it. A photo is never worth this kind of danger, so hold your wits and don't do anything dicey for a handful of pixels.
Aside from that, I will say that my definition of "winter" for this article is a bit loose. Meteorologically, it's only the coldest three months – December, January and February in the Northern Hemisphere. Astronomically, it doesn't begin until the winter solstice, around December 21st. But in reality, the "winter experience" can extend much longer depending on where you live, and the following advice still applies (aside from some of the dark sky advice). So, let's dive in.
The challenges of photographic equipment
It's not easy to use a camera in the cold, and it gets even more complicated as temperatures drop.
Use the camera with gloves
From an operational point of view, the biggest problem is using the camera with gloves. Depending on which camera you have, it can be easier or harder to set the correct settings if your fingers are constrained and awkward like they're stuck in an oven mitt. One of the unsung things I like about Nikon cameras is that you can select a menu item by simply pressing the right arrow (much easier to press even with gloves) rather than just the OK button.
Some photographers use fingerless gloves (or fingerless convertibles) to get around this, but this only works in moderately cold environments. If it's so cold and windy that your tear ducts start to freeze, fingerless gloves will also be dangerous due to the risk of frostbite.
There isn't a great way around this, other than to practice a lot and, whenever possible, use a tripod. But the gloves and camera you choose have an impact, so if you do a lot of winter photography, make your decisions with that in mind. It's also a good idea to bring along some heat packs so you can warm your hands if you need to expose them.
Humidity and condensation
Ease-of-use considerations aside, I'll note that most cameras aren't actually rated for shooting in especially cold conditions, to begin with. The typical temperature range is 0 to 40°C (32 to 104°F) for an advanced DSLR or mirrorless camera. This is already cold, of course, but not terribly so.
The reality is, most of the time, you can use cameras in much colder environments than they're advertised before they start failing. Not all features will work as well as usual, but that's to be expected. Your battery won't last that long, and there's a good chance your maximum FPS rate will drop. But, while it takes awfully low temperatures to actually damage most cameras on the market, remember that you can actually damage your camera gear (and even yourself) if you're not properly prepared. Also, in extremely cold conditions, camera bodies, lenses and plastic components can become extremely brittle, so they should be handled with care.
That said, one thing you definitely need to watch out for is humidity. If you take a cold camera into a warm environment – especially indoors, but also in a tent or car – it can fog up quickly. There is a risk of moisture condensing on or worse still inside the camera. Not only can this prevent you from taking pictures, especially if it fogs up again when you take it back outside, but, as you can imagine, it's not good for the electronics in most cameras. This is why it is important to protect it. The best thing to do to prevent this from happening is to leave your camera in your bag when you take it indoors, so it can warm up slowly. In very cold environments, you may also need to put the camera in an airtight plastic bag, such as one for freezers, before placing it in your bag and taking it inside. My advice is to leave the camera at least a couple of hours to warm up slowly before taking it out. , to recharge your batteries or just to warm up a bit.
The batteries
The passage on the batteries, allows me to remind you that the cold kills them. It's a known fact. Cold weather causes the batteries to run down faster than normal inside the camera and, even when not in use, they will still lose their charge.
To mitigate this problem and to avoid running out of battery power at a key moment, you will need to carry spare batteries with you and you will need to keep them in an inside pocket as close to your body as possible. Your body heat will protect them from discharge and thus allow you to shoot longer. You should also keep the main batteries warm this way, until you need to use the camera.
I would also recommend that you keep the camera inside your coat and close to your body, but this isn't always practical, especially. for bulkier equipment. However, if you're using a smaller camera system, a point-and-shoot camera, or even a smartphone, keeping it close and protected can help.
Some recommendations to follow when shooting in the cold.
The risk of freezing
Many cameras are made out of metal and when it gets down to really cold temperatures, metal can become a bit of a risk to our skin. In particular, when you hold the camera to the eye to take a picture, the nose, or other part of the face, may touch the camera body, this can lead to frostbite very quickly, even freezing of the nose on the camera!
To avoid freezing your nose, I recommend covering your face for protection, such as with a scarf or balaclava, or wrapping the camera body in something to protect you. Alternatively, shoot with a tripod and use the camera screen instead of the viewfinder to compose your shot, to avoid the problem altogether.
The clothing
This should go without saying, but sometimes the obvious needs to be stated. If you're outside in cold weather, you should wear clothing designed for cold weather. The secret is the layers - thermal base layers to start with and then build the layers up to the end with something that's ideally water and wind resistant.
Avoid cotton if you can, because if it gets wet from rain or snow or just if you're sweating, you'll get cold very quickly. Synthetic or wool fleece is a better option.
Don't forget a hat of course: I like a hat that covers my ears (either end is susceptible to frostbite), waterproof boots, warm socks, a scarf, and those gloves I mentioned earlier.
Don't forget to add lip balm and sunglasses (keep them on a lanyard) to your personal gear list. Staying hydrated and nourished is also important for keeping warm, so keep water and snacks handy.
A good camera bag
Not only is this a tip for photography in cold weather, but when you're out in extreme conditions, a good camera bag is a must. It will protect your gear until you're ready to use it. Choose something that is specifically designed to be a camera bag, as it will have the amount of padding needed to protect your gear.
Also choose a bag that offers some level of protection against the elements. When it's really cold, it's usually blowing snow, but a bag with a waterproof cover is still a good investment. You'll also want to make sure it fits all your gear and anything else you usually take with you when you're out (hand warmers, snacks, drinks etc).
A good tripod
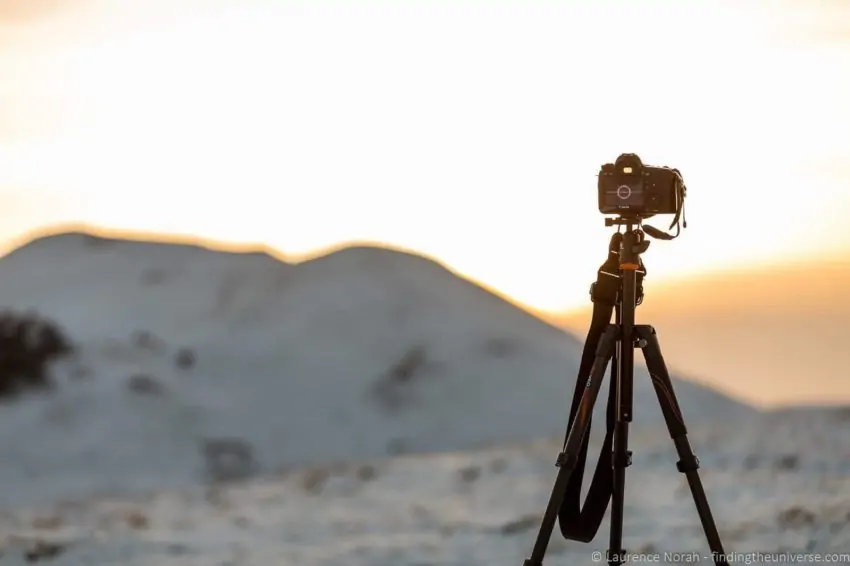
I'm always a big believer in using a tripod to help you improve your photography . This also applies to winter photography, especially if you're out at night trying to capture the night skies or the elusive northern and southern lights. That low level of light will require the use of long exposures, and the only way to do that is to make sure your camera is steady, something you absolutely can't do with your hands.
Now that our equipment and ourselves are ready to shoot, let's see how to set up the camera.
Snow can fool your light meter
One of the most challenging things in winter is getting proper exposure. All of the camera's metering systems are calibrated to base exposure on neutral tones or neutral grays. White, snowy landscapes will affect and most likely dominate the exposure reading of your camera's meter. As a result, relying solely on your camera's light meter to set exposure can lead to disappointing results when you find that all your winter snowy landscapes are underexposed and appear dull gray. While this might be the mood you're trying to capture, you'd normally expect snow to appear white regardless of the lighting conditions.
Knowing how the tool works, it is easy to get the correct exposure by adding positive compensation (overexposure). I find that even on an overcast day or in the shade, a snowy scene should be overexposed by +1 stop, or exposure value (EV). Sunlit snow scenes, on the other hand, may require a +2 Exposure Value (EV). But, be very careful going beyond the +2 EV offset, because things will start to get blown up with the loss of detail.
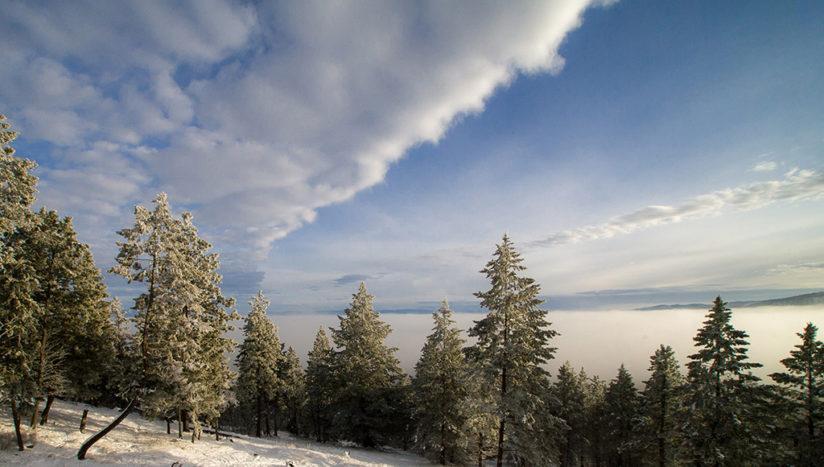
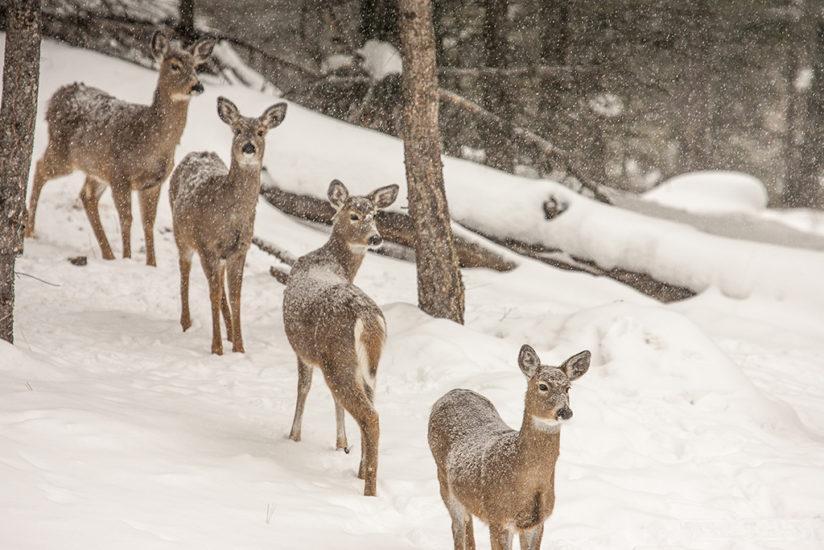
I prefer to work in manual exposure mode and use spot metering. This way, I can get a direct light meter reading on any object or part of the scene I want to measure. On clear days, I can start by first measuring the northern sky at about 45º above the horizon. So by adjusting the aperture or shutter speed, or both, I'm going to set the exposure between -1EV and +1EV, depending on how dark or light I want the sky to be. Next, I'll measure the snow to see how the light meter reading compares to the previously set exposure. If the reading is below +3 EV (or if the overexposure warning doesn't flash on the preview screen), I know I'm good to go. If the snow is too overexposed, I'll go back to re-measure the sky and reset the exposure one stop down, double-checking the snow metering and re-adjusting if necessary. This is a repeating process, and no two scenes will be the same; it just takes a lot of practice and patience until you get the hang of it. The photo below is a good example of an image obtained using this technique.
If the sky is overcast, I'll simply meter the snow and set the exposure to +1EV. Of course, in both situations, you can always single out something neutral in tone, like a gray rock or similar object, to set the exposure and then let everything else be exposed relative to that. The same principles apply in Shutter Priority or Aperture modes, but it's a little trickier to get a real picture of how different parts of the scene will display relative to each other, or to be able to predict which part of the scene will control the 'exposure. Also, if you don't use exposure lock, the exposure will change if you move the camera - too much room for error.
When in doubt, bracketed shots a stop or two above and below the initial exposure setting are the solution. This is best done in 1-stop (EV) increments. With experience, you will become more confident setting your exposure so that you need less bracketing. Always check your histogram and learn how to expect winter scenes to appear – they will generally be tilted to the right, as the snow will be overexposed.
It's a good idea to set "Exposure warning" in the camera's Custom Functions as well, so that any overexposed areas in the LCD preview screen will flash. It's okay to have some small, very bright areas that flash with overexposure, but it's good for any snowy parts or sky to do that. In that case, simply increase the shutter speed by one or more stops, or close the aperture by the same amount, until the flashing area in the preview is within tolerable limits.
Wildlife photography in the winter could be a little easier. Since they are usually the main subjects, having them correctly exposed is essential, everything else can be compromised if necessary. Again, I think it is best to aim the light meter at the animal, taking into consideration whether it is predominantly white, neutral-toned or dark, and then set the respective exposure compensation accordingly, i.e. +1EV, 0EV or - 1 EV as a starting point, then adjust as necessary after checking the histogram. This too will become more intuitive with experience and, if in doubt, choose the one you like best among the exhibits.
Don't forget the flash when shooting in winter. It can be used as an effective tool to highlight foreground objects, provide accent lighting, or eliminate unwanted shadows.
Filters for winter photography
My only standby filter, no matter the time of year, is the polarizer . This is a great tool for darkening blue skies, adding definition to clouds, eliminating reflections, and adding more saturation to colors. The only caveat is that it's easy to over-polarize with low winter sun angles, giving the sky an unnatural look, so it might be wise to take several frames with varying amounts of polarization to see what works best. The photo below shows the effect obtained with the use of a polarizer.

Graduated neutral density filters are useful when it becomes necessary to equalize exposure variations between different parts of a scene such as the foreground or background and the sky. I find a three stop gray graduated neutral density filter (#8) to work well for situations common in winter scenes.
Another filter that, however, is being used less in the digital age is a warm filter like the 81C. The complementary yellowish color neutralizes the bluish cast of snow that can occur on sunny or shady days. With digital it is used less, because setting the white balance to "Shadow" or adjusting it in post-production with Lightroom or other software will provide a similar effect.
Filters typically come in two types: those that screw directly onto the end of a lens, and those that slide into a holder (such as the Lee and Cokin systems). The latter may be preferable for winter use when working in heavy gloves.
Focus problems
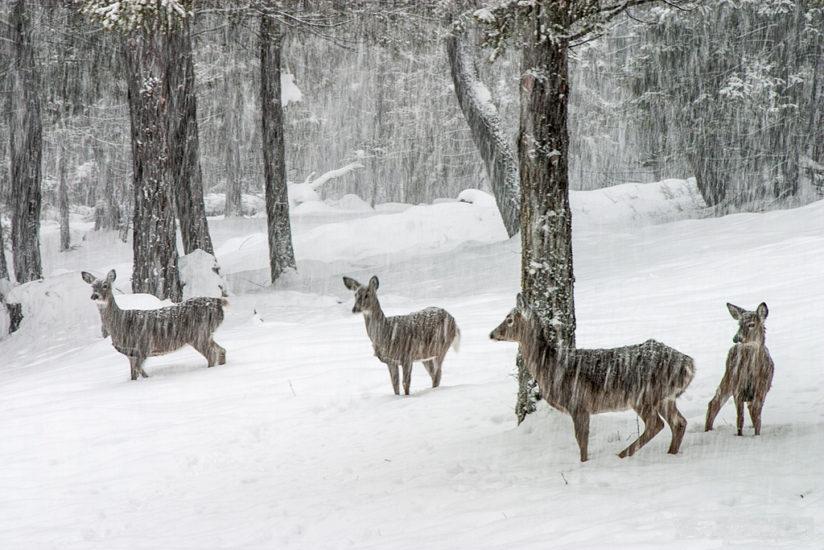
In low-contrast conditions, such as overcast or foggy days, or when snow is falling, the lens may have difficulty achieving autofocus. The following photo is an example of such a situation. Under these conditions, the lens may spin continuously as it tries to focus. Don't panic, it's not uncommon. The problem is that the lens can't find anything with enough contrast to lock focus. There may also be times when the lens will want to focus on the falling snow, rather than the main subject, leaving the subject soft or even completely out of focus.
When photographing under these circumstances, it is best to switch between auto and manual focus. While using manual focus, hold the shutter button halfway down, and once focus is achieved, the focus points in the viewfinder will illuminate to let you know you're good to go. Don't forget to turn autofocus back on when you're done.
The correct shutter speed to use
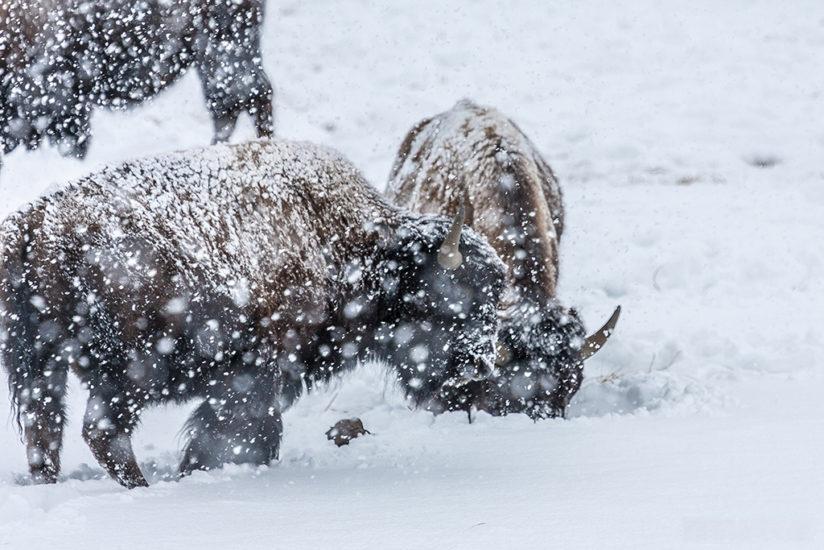
When it's snowing or the wind is howling, you need to make a conscientious assessment of shutter speed to get the desired result. Fast shutter speeds will stop any motion, while slow shutter speeds will result in blurry motion.
 The heavy snow required a shutter speed of 1/250 sec. stop the movement.
Falling snow is a good example. With a slow shutter speed, snowflakes will appear as white streaks, while a fast shutter speed will make the falling snow appear as white dots. So what's fast and what's slow? While softly falling snow on a still day can take as little as 1/125 sec. to freeze motion, in blizzard conditions, 1/350 sec. it will just be enough. So, if there's any question, consider grouping shots using various combinations of shutter speed and aperture to find out what works best depending on the conditions. The two photos show the effects of shutter speed with falling snow.
 Streaked snow with a shutter speed of 1/15 sec.
Winter and wildlife photography
Winter can be a harsh and critical time for wildlife. Their ability to conserve precious energy can be crucial to their very survival. For this reason, it is vital that photographers use common sense and ethical practices to avoid causing undue stress to wildlife that could endanger them. Learn to recognize any signs that an animal is uncomfortable, showing distress or disrupting its normal activity: if this happens, you are too close and you need to give the animal space by slowly backing away.
Of course it's best to avoid this situation in the first place by using a telephoto lens, keeping a respectful distance and not putting wildlife in a "fight or flight" situation. This can be critical in aiding their survival. Keep in mind that not all wildlife photos need to be close-up portraits; it is often just as interesting to take wide-angle photos from a distance, placing the animal in its winter environment.
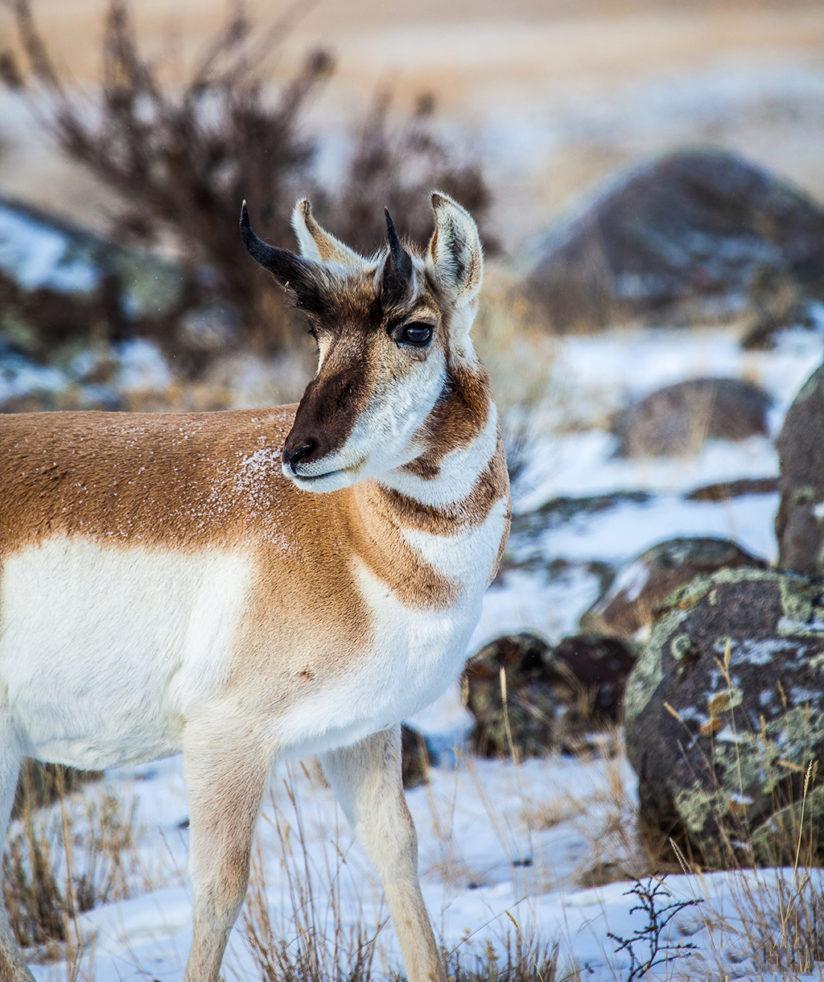
When photographing animals, focusing on the eye is key. Capturing the instant when a specular highlight occurs will make the image stand out even more, as shown in the photo below.
Now get out there!
Don't let the challenges of winter conditions stop you from getting outdoors. Winter is a unique time of year, where numerous and ever-changing photo opportunities abound. If you take advantage of the tips presented here, you are well on your way to a fun-filled winter season with the reward of some great pictures you can be proud of.
When you subscribe to the blog, we will send you an e-mail when there are new updates on the site so you wouldn't miss them.
About the author
By accepting you will be accessing a service provided by a third-party external to https://www.insightadv.it/


Comments