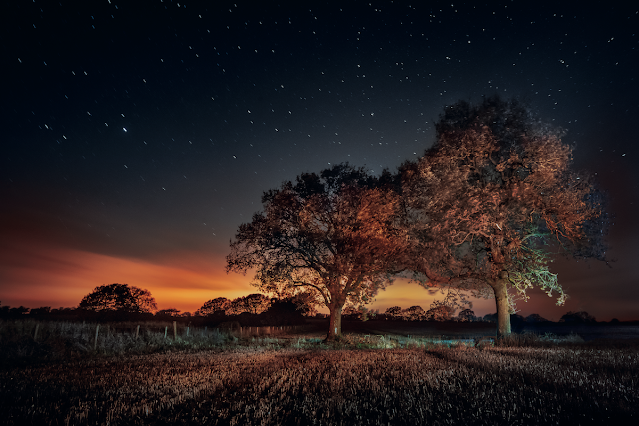
Our cameras can capture much more than our eyes can perceive. The "luminous painting" (or light painting) is a case in point: to the naked eye, a dark night is only dark. But if we lock the camera on a tripod, open the shutter, and wave a flashlight around, suddenly the sensor begins to see things differently than we do. For him, light is cumulative: when ambient light is low, we can offer him more, add it up gradually, and show him exactly what we want. With a single flashlight we can illuminate entire elements of a landscape and from multiple angles, highlight some details, hide others or even change the color of the night. Luminous painting is an art, but it's not difficult to start practicing it! Try it, like us, on the landscape for stunning results!
On the field. The preparation
- Camera. Our camera was set to shutter speed B, with an aperture of f/11 and ISO 800. As in the day, a small aperture ensures enough depth of field to keep the foreground, trees and distant sky in focus.
- Remote Shooting. You need a wireless system to leave the camera on the tripod and start the exposure when we're in position.
- Tripod. The exposure will go on for minutes and the camera needs to stay still, so a tripod is a must. Let's not move it between one shot and another: a fixed position gives us the possibility of joining multiple shots in post-production.
- Sky. A slight brightness in the sky adds atmosphere and gives more prominence to the trees on the horizon. Here the orange halo is the light pollution of a town a few kilometers away. Combined with the low, slow-moving clouds, it looks like a strange sunset.
- Night accessories. At night it is better to bring with us only the things we will need for the session. We arrive at the site before dark and check the surroundings well. In addition to the flashlight that we will use as a brush, let's bring a head one to keep on between shots.
- Torch. This scene is illuminated by the torch aimed at the trees and ground over the course of an exposure of approximately 2 minutes. Our torch is a powerful LED bicycle light, purchased on eBay for a few tens of euros.
The tricks. Brilliant examples
We shield the light bulb . The high light point of the bulb shouldn't show in the shot, so let's shield it from the lens, with your hand, body, or a do-it-yourself cardboard lens hood, like the one in the image.
Let's try jellies. Let's experiment with colorful brush strokes. In the example shot, the naked flashlight was giving a cool impact to the trees, so it was changed to an orange jelly. We can also mix more colors (here, we switched to blue mid-session).
We move the light. If the scene is lit by the camera position, it appears flat. Instead we try to direct the light to one side or the other to emphasize shapes and depth. We wear dark clothes to move around without appearing in the shot.
We walk onto the scene . Let's walk around the scene, avoiding pointing the flashlight at the lens, to highlight some points. Remember that light adds up: the longer we illuminate an object, the clearer it will appear in the final image.
Step by step. Let's combine multiple shots.
Let's combine multiple shots. Let's open the images in Adobe Photoshop, copy them on top of each other and experiment with blending modes. Lighten and Dodge are especially good. Alternatively, let's add a layer mask and brush black to hide and white to reveal parts of the scene.
Balancing. Let's not trust the automatic balance because it can be fooled by low light. We shoot in RAW and set the balance during conversion in Camera Raw / Lightroom. We can introduce creative toning with the Hue and Temperature sliders.
Dodge and Burn . Selectively lightening or darkening parts of an image can highlight or blur brighter details – and it's a must, because it's hard to balance the light well in a shot. We use local tools like Healing Brush or Radial Filter from Camera Raw/Lightroom.


